Why Install Google Analytics?
Having a strong web presence is critical in today’s business world. Most businesses start their online web presence journey with creating a website. While having a website is a great start to elevating your online presence; it is also important that your website contributes to your companies overall brand image, marketing strategy and clearly communicates what services and/or products your company provides.
Furthermore, it is even more important to be able to track website visitors to better understand user behavior on your website and optimize your website to take a desired action.
Some examples may include, entering their email, making a purchase, viewing a specific page, etc. By tracking different metrics and KPI’s (key performance indicators), you can measure what impact your website has on your business.
Additionally, it can give insight into which pages you should focus on. For example, you may have a page that you think a lot of people visit (a hunch), so you start spending a lot of time on the page to make it better.
After installing Google Analytics, you find out that you actually have very little traffic coming to that page. Therefore, your efforts would have been better spent on other pages on your website.
So… you might be thinking, “how do you install Google Analytics and start gathering insightful information about your website?” We strongly recommend installing Google Analytics. This is free software that you can leverage to gain valuable insight about your website traffic.
How Do You Install Google Analytics On WordPress?
There are several ways that you can go about installing Google Analytics on a WordPress website and this tutorial will explain how to install it using several different installation methods. This post will walk through each step separately in an easy to understand and thorough process.
Start By Creating A Google Account
In order to use any Google products including, Google Plus, Gmail, Youtube, Google Drive or others, you must have a Google Account. Once the account is created, you can use this account to access any of Google’s Products.
If you do not have an account, simply click here to create a Google Account.
Create A Google Analytics Account
After you have created a Google Account, you can head over to Google Analytics. Before you can install Google Analytics on your WordPress website, you will need to create an account on Google Analytics.
After arriving to the Google Analytics page, click on the drop-down menu or the top-right side of the screen. There will be an option for Google Analytics Premium and Google Analytics. Make sure to select Google Analytics (free version)Â opposed to Google Analytics Premium.
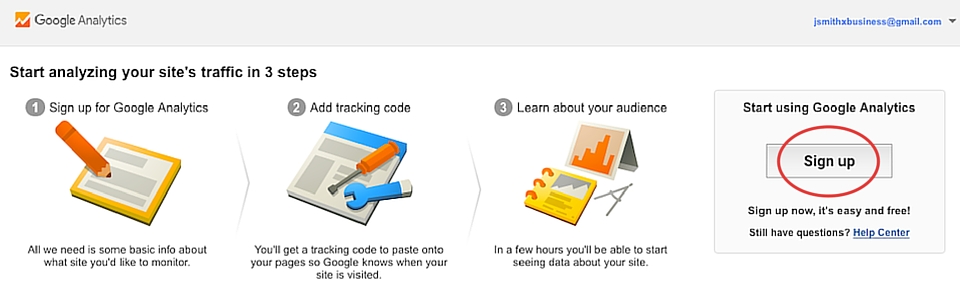
Once you have selected Google Analytics, you will be re-directed to the website and you will need to create an account inside Google Analytics. Simply click, “sign-up” on the right side of the screen.

Following, you will be directed to another page where you will have to create a new account for yourself or your company. Each account is broken into 3 tiers; Accounts, Property and View. You do not need to overthink this too heavily. Simply, fill out the information that is prompted to the best of your ability.
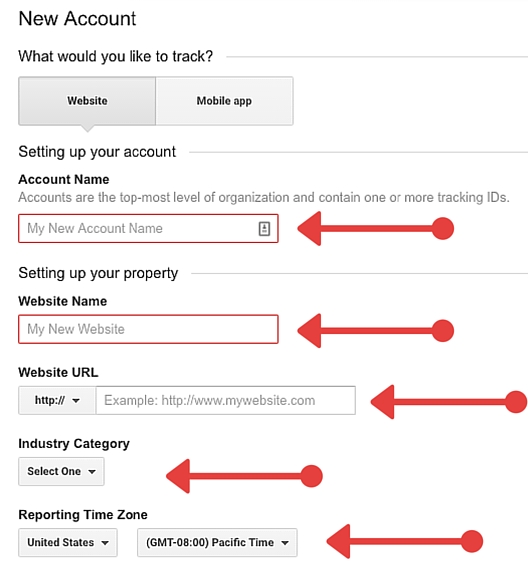
Account Name
The account name is the top level structure for any account. Therefore, you want to enter the name that specifies the top-level of your company or organization. This can either be the name of the website, name of a business, etc. Each account can have multiple websites within each property.
Website Name
This is simply the name of the website and can be the same name as the website URL.
Website URL
This is the domain of the website that you want to track for example, wordpress-1386733-5134080.cloudwaysapps.com. Make sure to select http or https from the drop-down menu.
Industry Category
The industry category is optional to select but allows you to compare your site metrics with other websites that are in the same industry. This is completely optional.
Reporting Time Zone
The reporting time zone is very important to enter and if you change it in the future the date is NOT retroactive which in simple terms means that your past data will be reported in the previously selected time-zone. Simply, enter the time-zone that your company is based.
If you are a geographically independent company that does not have a specific geographic location then enter a time-zone that is your home base. Remember that whichever time zone you enter, all the data will be reported based on that time-zone.
Data Sharing
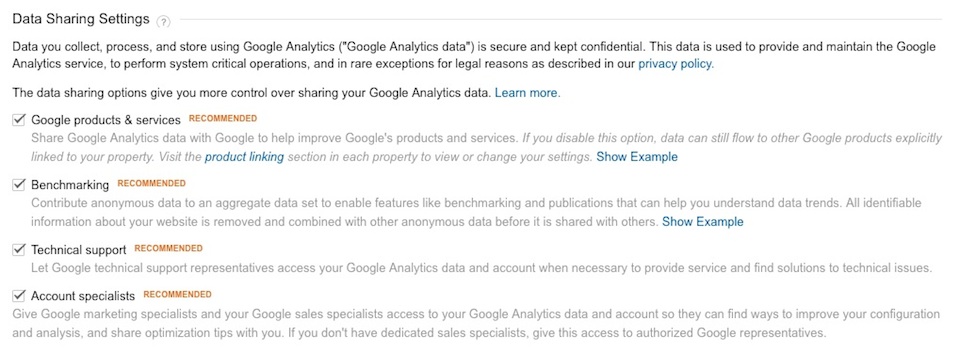
By opting in to the data sharing options, you allow Google to use your websites analytics data. This is totally optional. Each option has a brief description to help you better understand what you are opting into.
The last 2 options can be helpful as these allow either technical support or an account specialist to access your account when necessary.
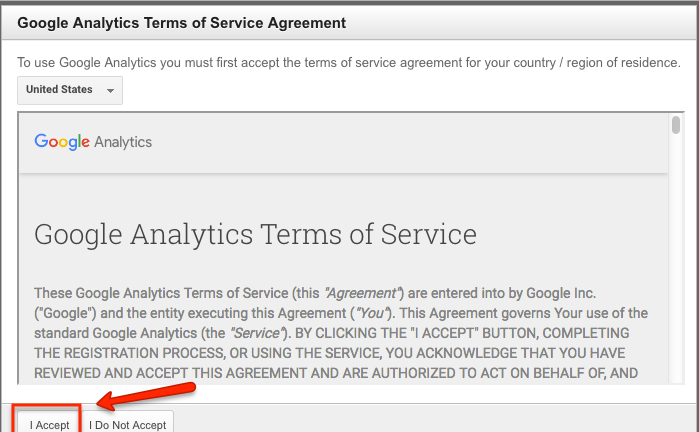
Next, you will see a pop-up of the Google Analytics Terms Of Use. This contains all of the specific legal information that you have to agree to, in order to use Google Analytics. You can choose to read it and then scroll to the bottom and click, “I Accept.”
Now, your account is set-up and you will have a Universal Analytics (UA) tracking code. You will need this code and/or the UA Tracking I.D to install Google Analytics on your WordPress website. You do not need to write down the tracking code as you can access it any time by logging into your Google Analytics account.
![]()
Now that you have created an account and can access your tracking code, you will need to install it on your WordPress site. You can do this by either using a WordPress plugin to install the code or your can add it manually to your websites theme. The next two sections will walk you through these two processes separately.
How To Install Google Analytics With A WordPress Plugin
Now that you have created a Google Analytics Account and you have your tracking code, you need to install it on your WordPress website. One of the easiest methods and least technical methods is to install the code via a WordPress plugin.
The above video will walk you through the process if you want to install via a WordPress plugin. I will also break down the steps below.
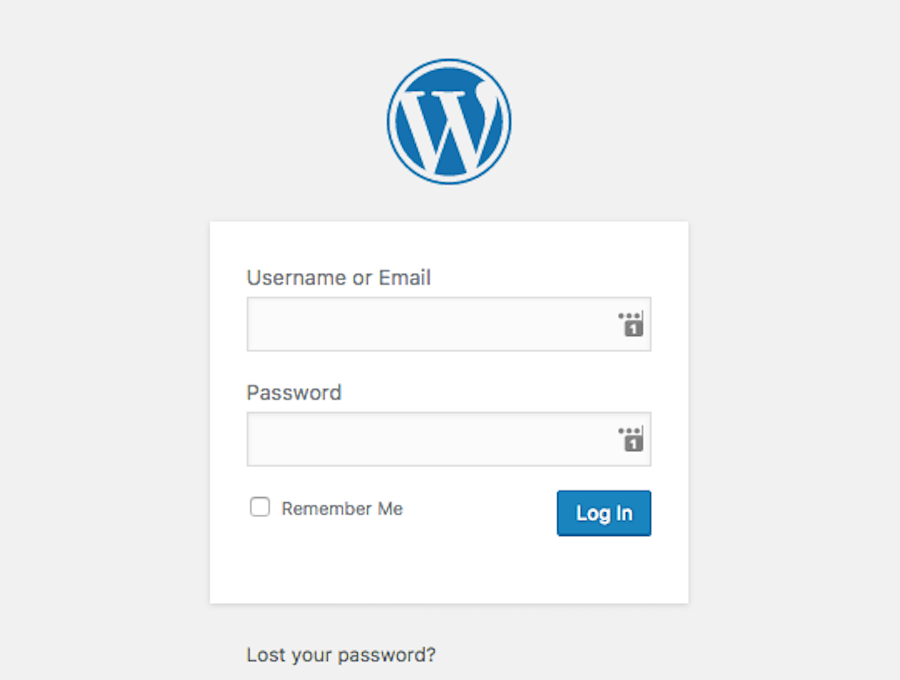
- Go to your WordPress site and login
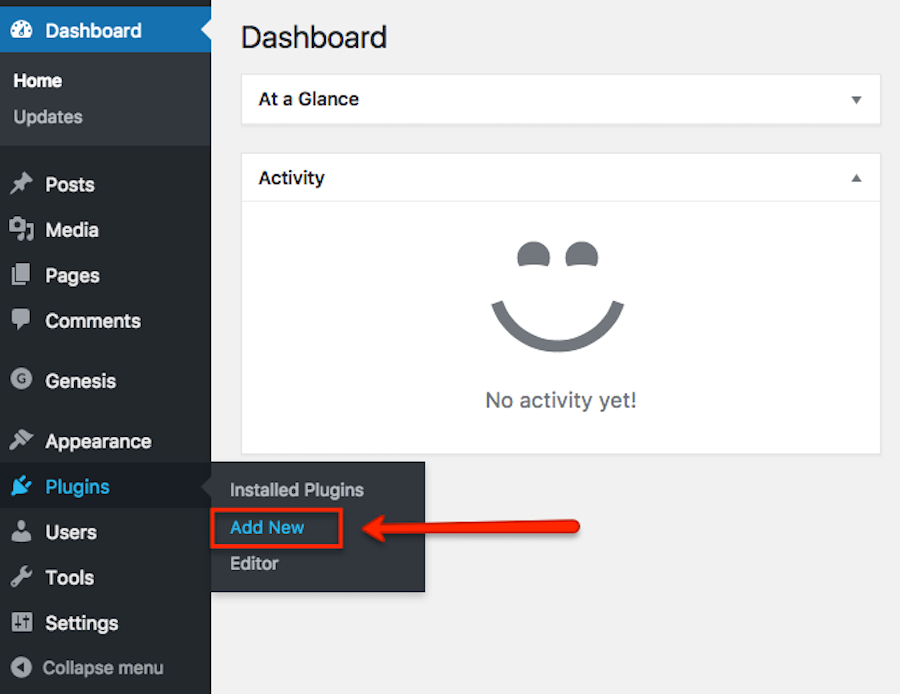
In your WordPress dashboard, hover on “plugins” and click “add new.”
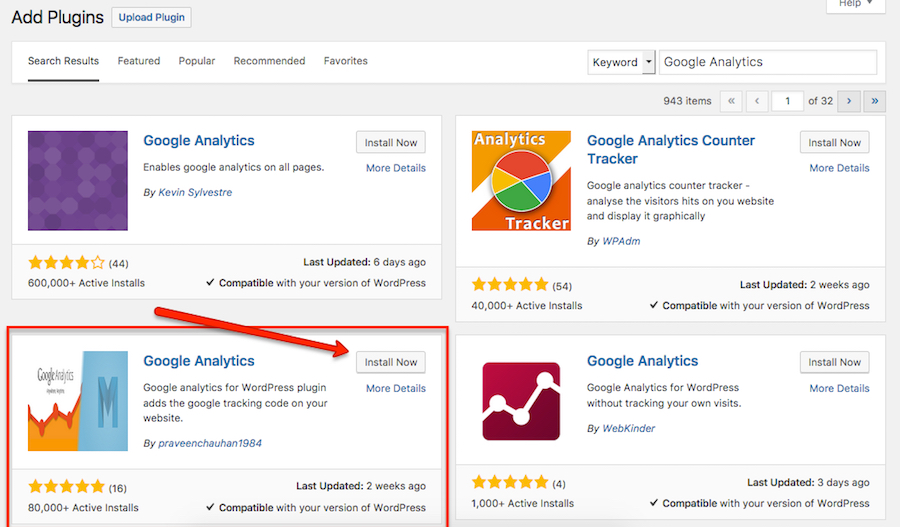
In the search bar, search, “Google Analytics.”
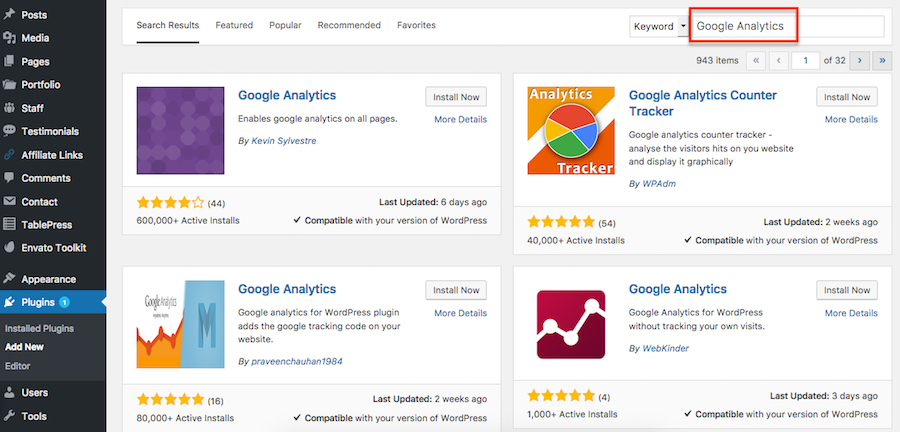
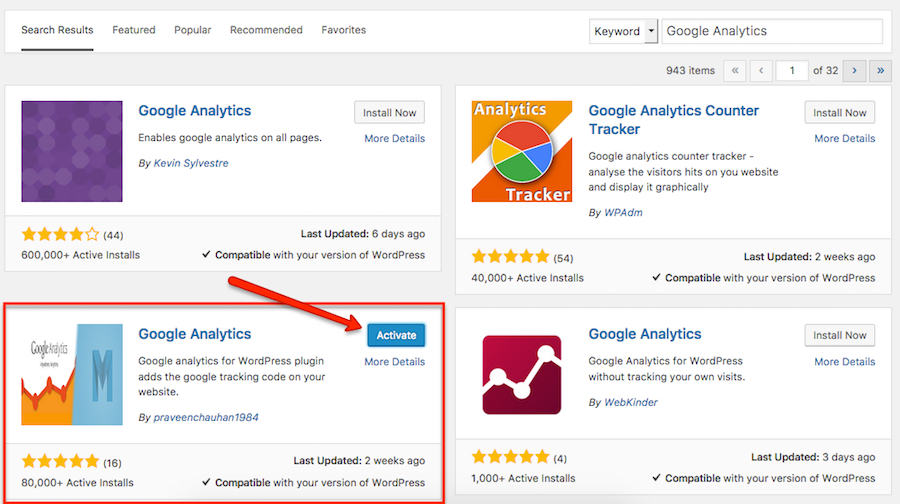
Choose the plugin by the aurthor, “Praveenchauhan” and click, “install now” then “activate.”
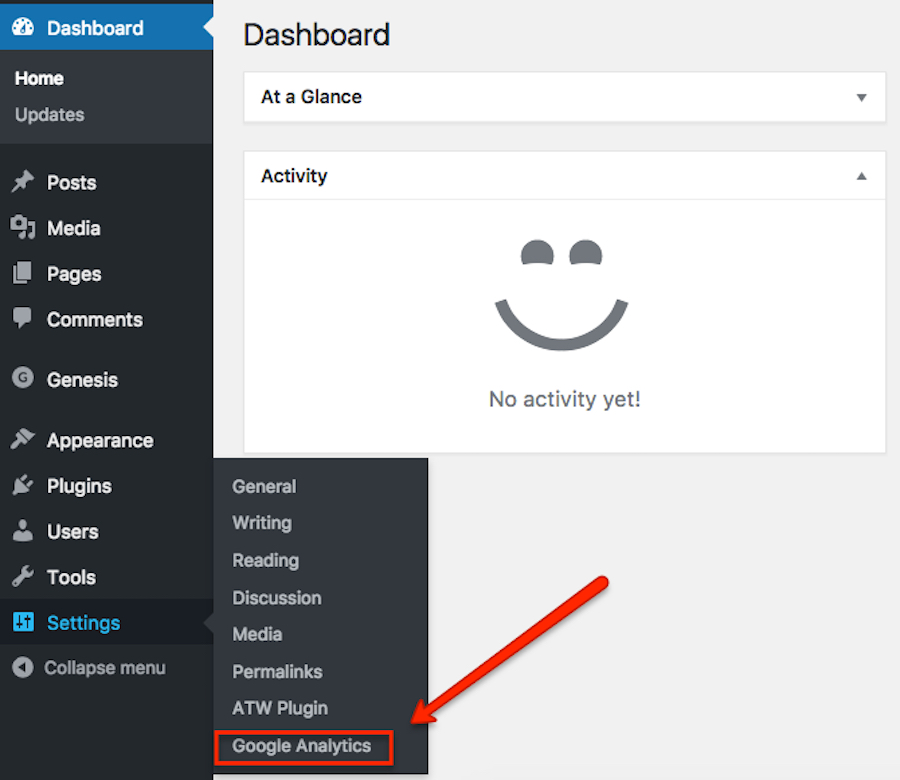
Following, hover your mouse over, “settings” and click, “Google Analytics.”
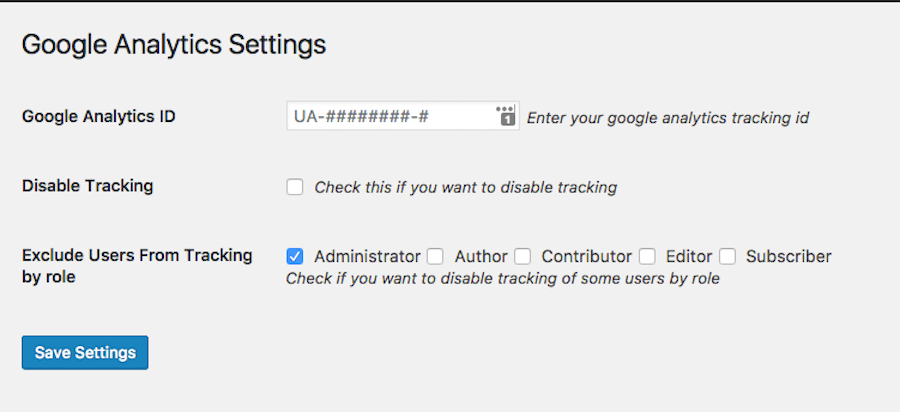
Next you will see the settings screen, you will need to add your Google Analytics Universal I.D.
Log into Google Analytics and click on the “admin” tab
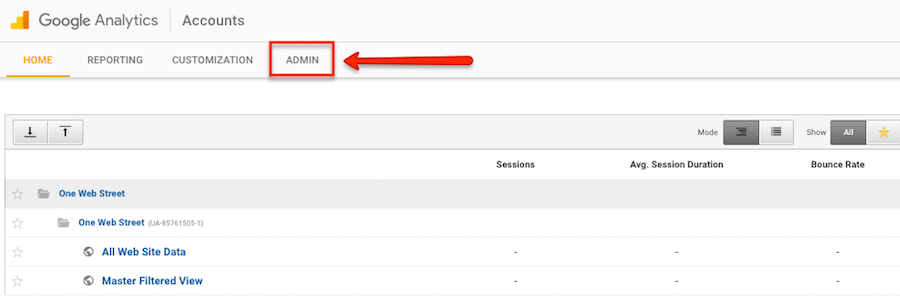
In the middle column titled, “Property” click on “Tracking info,” then “Tracking Code.”
![]()
![]()
![]()
You will need to copy the UA tracking code and paste it into the Google Analytics settings page. The code will look similar to: “UA-50612362-1.” Keep in mind that every UA code is different so it is important that you use the code that is shown in your Google Analytics account. Otherwise, you may gather analytics from a different website… which would be counter-productive.
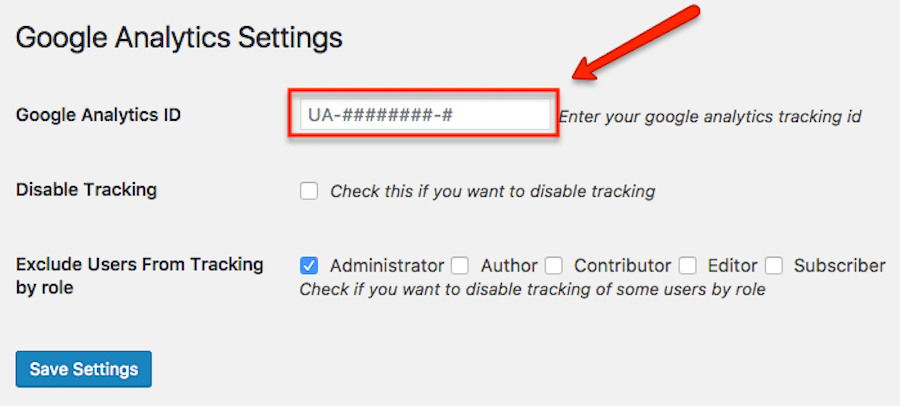
Once you have added the code you can choose to exclude any users from your data such as administrators, etc. This will help keep you data clean by excluding people within your organization from your website metrics. Afterwords, click “save settings” and your website data will start to be collected by Google Analytics.
How To Install Google Analytics Manually Using Code?
This method can often overwhelm people that are not comfortable on their computer and nervous that they may break something. Although, this method is more technical, we believe that it is a better method because you do not have to rely on a plugin.
For example, if you update a plugin and it breaks, then the code may not get configured properly and data will not be sent to Google Analytics.
So, if you feel up to it, here is how you install the code manually. After creating your Google Analytics account, you will need to get the javascript code in your Google Analytics dashboard. Simply copy the code and paste into a text editor for safe keeping.
![]()
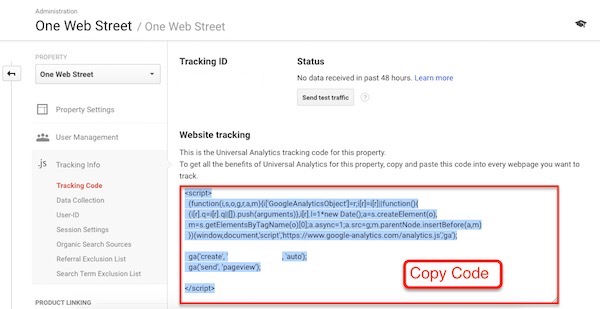
Based on this Google support link, you need to paste the code before the closing </html> tag on all your site pages that you want tracked.
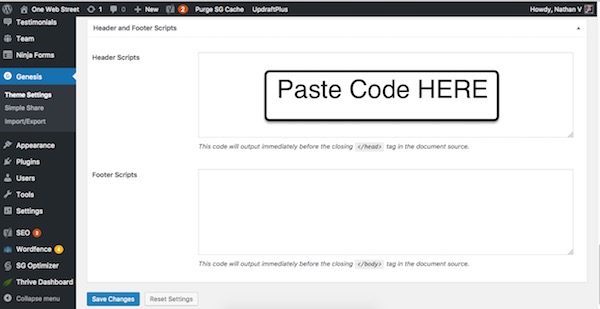
Most paid WordPress themes have a setting where you can simply paste the code and the theme will insert the code correctly on each page of your website. We use the Genesis theme and we will show you how to insert the copied code into Genesis.
First start by logging into your WordPress website into the dashboard.
Following, hover your mouse over the Genesis tab on the left menu column.
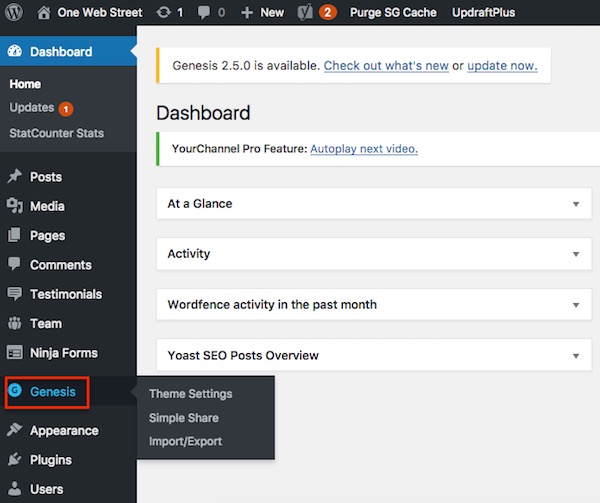
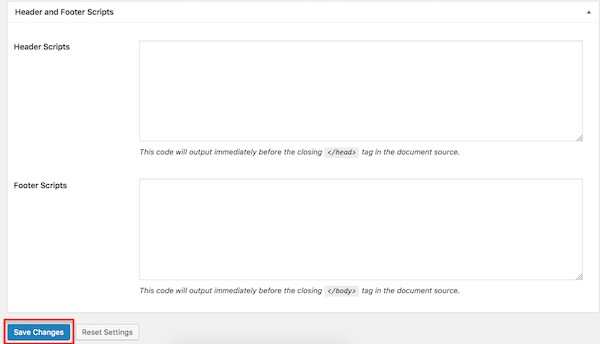
Click on “theme settings,” scroll down the page to the section titled, “Header and Footer Scripts.” Then paste the copied code into the Header Scripts section and click save.
How Do I know If It Is Working?
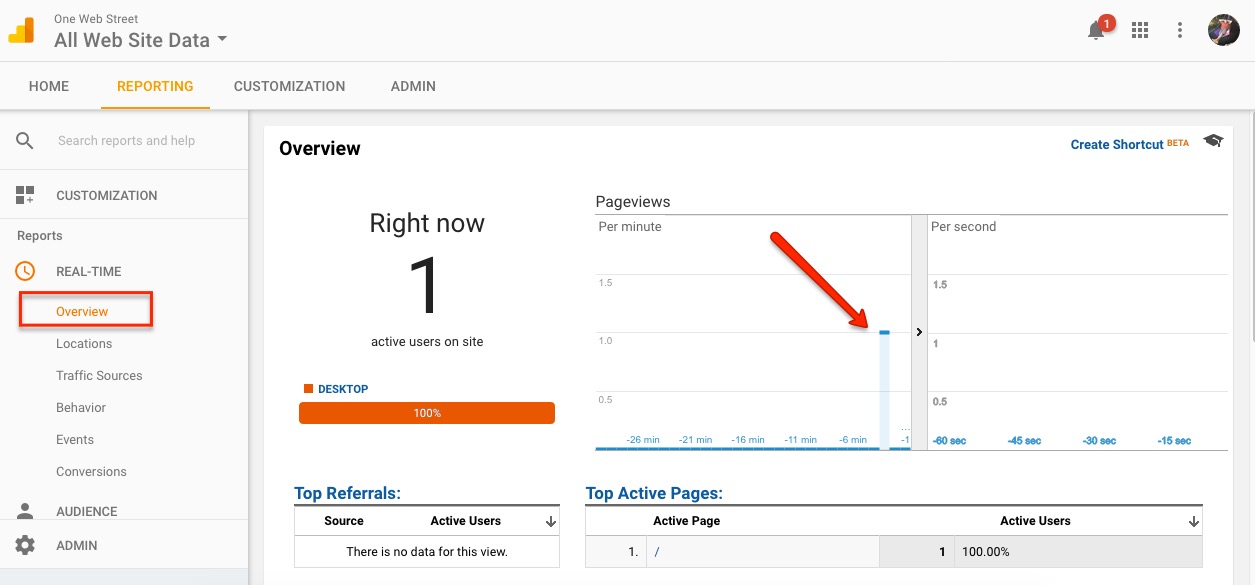
After you have installed the code manually or via a WordPress plugin you need to test whether it is configured correctly. You can verify whether you have configured it properly by logging into Google Analytics and clicking on “Real-Time” on the left side-menu.
This page shows actual traffic to the site in real-time, therefore you will need to load the page on a separate tab in your browser to see if the tracking code is installed correctly.
After 24 hours, you should start to see data in your Google Analytics account when viewing other pages within Google Analytics. I suggest you wait and gather information via Google Analytics before you start making large site-wide changes based on data that you have collected. This also largely depends on how many users are coming to your site. More visitors = more reliable data.